




Laugh. Learn. Love cats.
Newton: We were invited to participate in the My Writing Process blog tour by the kitties of The Cat on my Head (and their human, Janet). They have been blogging since July of 2012, and one of the really fun things about visiting their site is reading the their sidebar. You don’t read sidebars often, but they used to have original poetry there, and now they feature tales from the cat scouts. It’s a fun bonus to keeping up with Lily Olivia, Mauricio, Misty May, Giulietta, Fiona, Astrid, Lisbeth, and Calista Jo.
The blog tour asks you to answer a series of questions, so I had better get started!
 Actually, I’m going to delegate this questions-answering stuff to the head peep. This sounds too much like work, and I’m a spokescat. I’m too handsome to do work.
The most time-consuming posts for the blog are Topical Thursday posts, since they usually require research. I often have one or two of them in draft form and try to have at least one ready to go. At the moment, I’m gathering photos for a draft about alternative litterboxes and finishing photo edits for a blog post about a visit to Big Cat Rescue last week.
I’m also working on getting more familiar with our local rescue community to better locate the special needs cats in our area to be featured as adorable adoptables. Rescuing Ashton made me realize how many less-adoptable cats were out there, and they all deserve to be part of families the way she is. The local cat rescue community isn’t very cohesive, so this is an ongoing challenge.
Additionally, I’m working on some research for a (non-cat-related!) urban fantasy novel that I may draft during this November’s NaNoWriMo event. I have a rough draft of another completed, but unlike a lot of writers, I write novels because I enjoy the process, not because I want to publish them. Yes, I write novels for fun. That probably defines a writer!
I keep a list of potential Topical Thursday subjects in a couple places… some are on my phone in the Notesy app, which replicate to my PC using Dropbox. Others are in text files in a designated folder on my PC, which is backed up to Dropbox so that I can access it anywhere. I sometimes begin drafting topics in Notesy on my phone so I have a head start before I sit down if I find time when I’m away from the PC. Otherwise, I sit down at the computer and write up the topical post, then go hunting for relevant photos.
My process for writing most other posts about the cats is the opposite. I take a ton of photos, then go through a folder of raw photos to find the ones that can help tell a story… then it’s just a matter of helping the story along with some dialogue or narrative.
Unlike a lot of other folks these days who use laptops exclusively, I do my work primarily at a desktop computer. I have a geeky background in gaming where desktops are preferred for their graphics processing power, and though I don’t have time to play games on the computer any more, I stick to some of the workflows on the bigger PC. One of the things I use a lot is multiple monitors. I usually write on my left screen and edit photos on the right screen. This has the bonus effect of making it harder for Pierre to stand completely in front of all of my monitor space when I absolutely need to get something done.
Pierre: I heard that!

Challenge accepted!

The blog is currently publishing Monday through Friday, and I try to have the week’s post queued up by Sunday night so that I can work on other things and find time to visit everyone else’s blogs during the week. I use a WordPress plugin that displays a little calendar and marks the dates that have future posts. It’s very satisfying to see a week’s worth of day’s marked off ahead of time, and I had no idea how much of a relief it would be to not scramble for a new post nightly.
I’m a writer. I have been writing most of my life, and I have written professionally for many years. But my professional writing is boring, technical stuff, not anything you would be interested in reading here!
I started writing Topical Thursdays features in part because it seems like among my friends, I’m the one that everyone comes to when they have a cat question. I realized that I end up knowing things about cats that others don’t simply because I read about them. I’m not an expert about anything about cats, but I like consolidating the information I know and gathering new facts to complete the picture. Occasionally, a Topical Thursday post goes live, and I have second thoughts, afraid that the content is totally obvious. When that happens, inevitably someone who I respect comments that they didn’t know about whatever it was. That really makes me glad I spend the time writing those posts.
For the rest of the blog, I post about the cats and their interactions because they’re in charge and they wouldn’t have it any other way.
Pierre: Weren’t you supposed to be writing? I don’t even see a rough draft here.
Newton: No peeking!
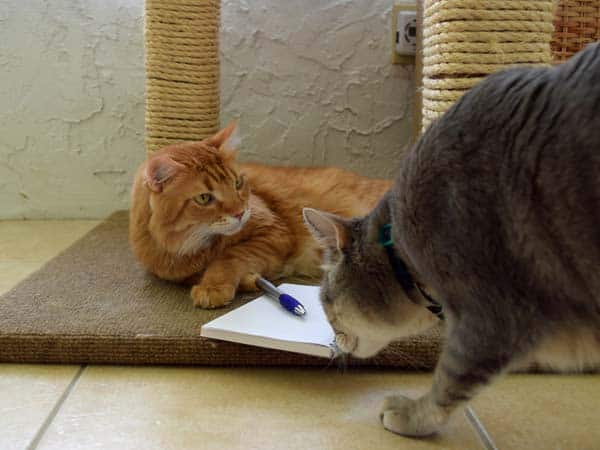
Newton: The last part of the blog tour rules is that we are supposed to pass this on to three other writers. The problem is that I was lurking in the kitchen for treats instead of keeping track of who has already done the tour. So if no one has invited you yet, please consider yourself invited by me!
Pierre: We’re going to let the head peep write this post, because the idea of our cat tree being torn apart was too much to bear, and we all looked away. Only she knows what happened when our cat tree was refurbished, so we’ll let her tell how it worked.

It had been over fifteen years since the rug on the old cat tree had been replaced. The recarpeting job meant completely disassembling the tree, which was a great opportunity to capture photos of how to build a cat tree.
This cat tree was originally over-engineered with much heavier and higher quality materials than you usually find in a commercially-available cat tree, but it has lasted over 15 years, including five moves, two of which were at the mercy of professional interstate movers. You could substitute other materials, but our tree is made of the following:
 A 44 x 24″ sheet of 3/4″ thick Plywood cut into:

Also used in this project:
 Cut up the carpet to the appropriate size. I honestly didn’t measure, so I can’t give exact sizes, but make sure it wraps well around each piece of wood. After cutting the carpet, to prevent it from fraying, brush on a thick bead of white glue (I used Elmer’s) and make sure that it gets down into the fabric of the carpet edge so that it holds the little bits that might tend to fray. I used two layers of glue, to be sure I really got it down in there. I’m told that fabric glue might have been a better choice, but Elmer’s seems to work (and I didn’t know about the fabric glue until later). Let it dry completely. I clipped it to a line and let it dry overnight, until the glue had dried clear.
Do a rough assembly of parts and use a pen or pencil to mark where the upright posts of the cat tree meet the base. You’ll use this as the bottom of the platform, to guide you where to put the posts. Having a friend on hand to help hold things together at this point is helpful, because it’s like putting Jenga back together again, only the pieces are heavy. The goal of this step is to make sure that when you attach the upright pieces, you know where they should go so that you don’t attach upright pieces too far apart for the upper tiers to reach across them.
Lay the largest piece of plywood on the piece of carpet cut for it and wrap the carpet around the edges. Use the staple gun to attach the carpet partway along the bottom, but don’t attach it all the way. Leave the parts where you drew the locations for the uprights unstapled for now so that you can attach the carpet over them last and cover any protruding screw heads to protect your floor.

Now the tricky part starts. Use something to prop the upright post so that it lays flat but is the appropriate distance from the edge of the base. We used scrap wood that was left over from a previous project. Then position the first upright post in place against the base and screw through the base into it. Use at least three or four screws to be sure that it’s really secure. Remember, your cat is going to be launching on and off of this thing, so keeping it sturdy is important.
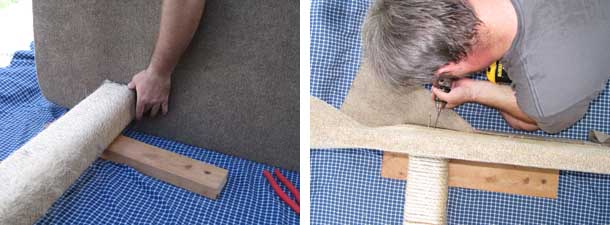
Turn the base and attach the second post to it the same way. It helps if you can support the already-attached post, since it’s heavy and can make the base unwieldy. A step ladder proved a good height to prop the existing post while the second one was attached.
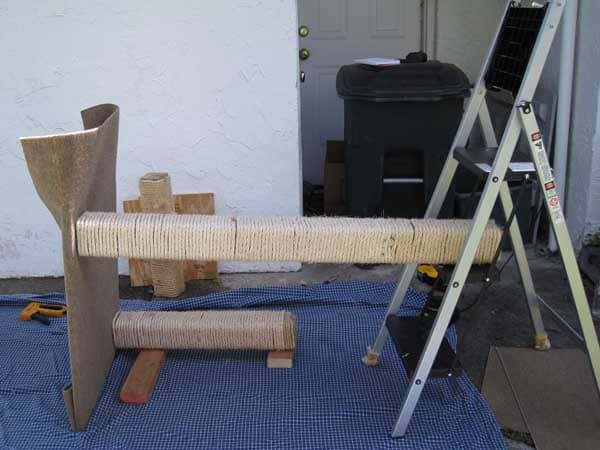
Once both posts are attached to the base, finish folding the rug around the bottom of the base and staple it securely. You can use a hammer to really knock the staples flat and make sure they won’t scratch your floor.
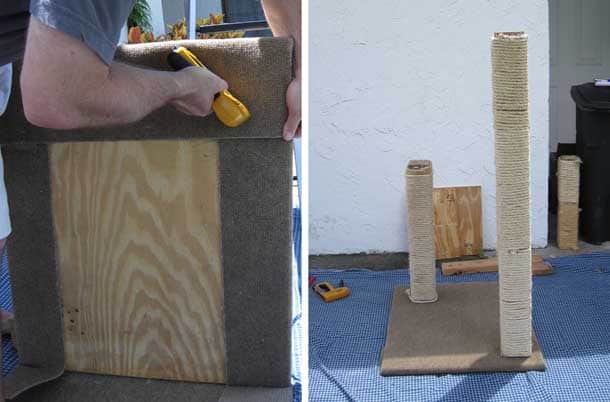
Next, lay the remaining platforms on their respective pieces of carpet. Fold the carpet around them and staple securely. You will need the 1/2″ staples for the places that the carpet overlaps in several thicknesses. Again, you can use a hammer to make sure that the staples are flush with the wood.

Position the corner of the middle platform on the shorter post and screw it on.
 If you drive the screws directly down into the carpet and tighten them flush, they will vanish into the texture of the carpet, and they won’t pose a hazard to the cats when they use the tree.
You want to make sure that nothing is sticking up or through the platforms that could poke up and injure a cat climbing on the tree, and also make sure that all screws and other hardware are flush with the wood so that they don’t pose any kind of an injury hazard. Having a tree hurt them is a sure way to prevent a cat from ever using it again.
(This is the point in the project where Florida’s daily 4pm rainstorm arrived several hours early, and the whole project had to relocate to the garage. I only took a couple photos in the garage because I may overshare a lot of things, but my messy garage is not one of them.)
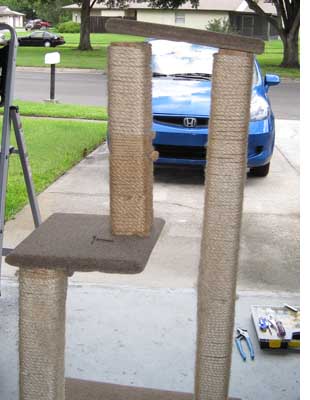 Attach the corner of the small, top platform to the tall pole.
Now you have the middle platform attached to the shorter pole and the top platform attached to the tall pole. This allows you to adjust the location of the final pole so that it spans the distance between the middle and top platforms.
Screwing them in is a little tricky. This would have been easier if the rain hadn’t driven us indoors, so I don’t have photos of the attachment process. Screw the top of the pole into the top platform, then lay down and screw up through the middle platform to screw the bottom of the pole securely to the middle platform.
If the cat tree was being made from scratch, the final step would be to wrap the poles in sisal rope. Since since this was a refurbishment, they were already wrapped, and the cat tree could go back into the house.
The result…
Newton: This doesn’t smell quite like my cat tree.
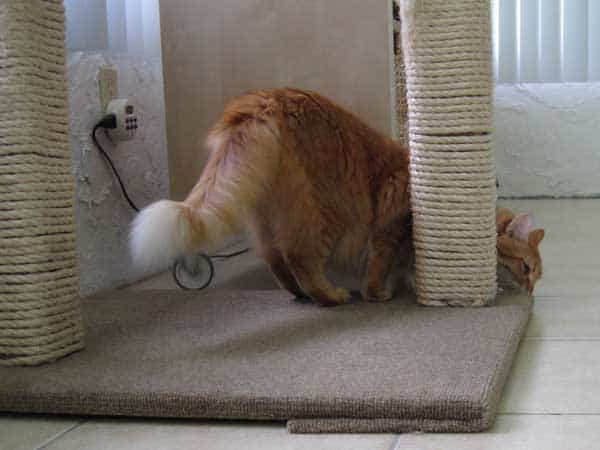
Newton: Hey, Pierre, what do you think?
Pierre: *sniff sniff* You’re right. This doesn’t smell the same.

Pierre: It’s acceptable. But it’s going to take some time for it to smell the right way. Don’t do that to my tree again soon, okay?

Special thanks to the manpeep for his help with recarpeting the cat tree and for doing all the stuff with power tools. The project went much faster with his help!
Hey, we’re going to be re carpeting that cat tree soon so it doesn’t go into the junk pile.
Ashton: Oh my COD! You’re going to do WHAT to my cat tree?

Newton: Calm down, she said they would re carpet the tree instead of getting rid of it
Ashton: Get rid of it? This is the only place I will let some people pet me!
Newton: That’s why they’re planning to recover it, even though it’s older than any of us.
Ashton: *whew*

Newton But it was pretty funny to see you panic like that.

Newton: Your eyes were THIS big!

Ashton: You did not just make fun of me. I know where you sleep at night.

Newton: Umm… uh-oh.