Pierre: We’re going to let the head peep write this post, because the idea of our cat tree being torn apart was too much to bear, and we all looked away. Only she knows what happened when our cat tree was refurbished, so we’ll let her tell how it worked.

It had been over fifteen years since the rug on the old cat tree had been replaced. The recarpeting job meant completely disassembling the tree, which was a great opportunity to capture photos of how to build a cat tree.
Materials
This cat tree was originally over-engineered with much heavier and higher quality materials than you usually find in a commercially-available cat tree, but it has lasted over 15 years, including five moves, two of which were at the mercy of professional interstate movers. You could substitute other materials, but our tree is made of the following:
 A 44 x 24″ sheet of 3/4″ thick Plywood cut into:
- 24 x 28″ (for base)
- 16 x 11″ (for top)
- 16 x 13″ (for middle tier)
(Hint: Your local home improvement store will cut pieces to size for you when you purchase the wood there. When I originally built the tree, I didn’t know anyone with a saw. You don’t have to have one, either!)
- An 8′ length 4 x 4 (which is actually 3 1/2 x 3 1/2″, something that people like me who don’t usually do carpentry find puzzling), cut into:
- 48″
- 26.25″
- 21.25″
- Carpet
I bought a 4.5 foot length of a 6′ wide carpet for this project at the local home improvement store. The previous carpet that lasted fifteen years was thick and had a padded backing. This carpet is thinner and doesn’t have a backing. It is easier to manipulate the thinner carpet, but it won’t last as long. - Sisal rope
The uprights of the cat tree were already wrapped since this was a refurbishment, so I can’t say how much you need. I can promise you’ll use more than you expect. This post doesn’t go over how to wrap the sisal, but I talked a little about a sisal refurbishment in a previous post.

Also used in this project:
- White glue (like Elmer’s)
- Staple Gun with both 1/4″ and 1/2″ staples
You might be able to get away with just 1/2″ staples, but it’s a lot easier to staple the 1/4″ staples through a single thickness of carpet and use the 1/2″ only when you have to staple through multiple thicknesses - Drill with a Phillips head driving bit. A magnetic drive guide helps keeps screws straight but isn’t necessary.
- Long screws (2 1/2″)
Preparation
 Cut up the carpet to the appropriate size. I honestly didn’t measure, so I can’t give exact sizes, but make sure it wraps well around each piece of wood. After cutting the carpet, to prevent it from fraying, brush on a thick bead of white glue (I used Elmer’s) and make sure that it gets down into the fabric of the carpet edge so that it holds the little bits that might tend to fray. I used two layers of glue, to be sure I really got it down in there. I’m told that fabric glue might have been a better choice, but Elmer’s seems to work (and I didn’t know about the fabric glue until later). Let it dry completely. I clipped it to a line and let it dry overnight, until the glue had dried clear.
Do a rough assembly of parts and use a pen or pencil to mark where the upright posts of the cat tree meet the base. You’ll use this as the bottom of the platform, to guide you where to put the posts. Having a friend on hand to help hold things together at this point is helpful, because it’s like putting Jenga back together again, only the pieces are heavy. The goal of this step is to make sure that when you attach the upright pieces, you know where they should go so that you don’t attach upright pieces too far apart for the upper tiers to reach across them.
Assembly
Lay the largest piece of plywood on the piece of carpet cut for it and wrap the carpet around the edges. Use the staple gun to attach the carpet partway along the bottom, but don’t attach it all the way. Leave the parts where you drew the locations for the uprights unstapled for now so that you can attach the carpet over them last and cover any protruding screw heads to protect your floor.

Now the tricky part starts. Use something to prop the upright post so that it lays flat but is the appropriate distance from the edge of the base. We used scrap wood that was left over from a previous project. Then position the first upright post in place against the base and screw through the base into it. Use at least three or four screws to be sure that it’s really secure. Remember, your cat is going to be launching on and off of this thing, so keeping it sturdy is important.
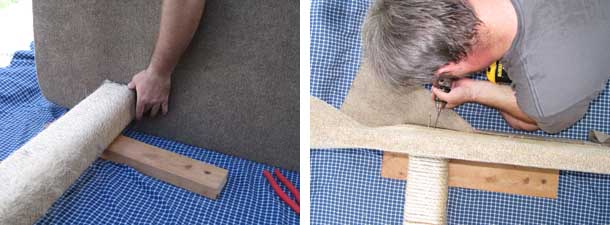
Turn the base and attach the second post to it the same way. It helps if you can support the already-attached post, since it’s heavy and can make the base unwieldy. A step ladder proved a good height to prop the existing post while the second one was attached.
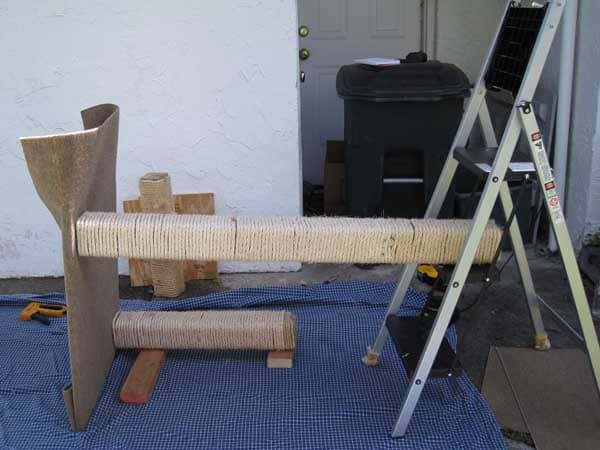
Once both posts are attached to the base, finish folding the rug around the bottom of the base and staple it securely. You can use a hammer to really knock the staples flat and make sure they won’t scratch your floor.
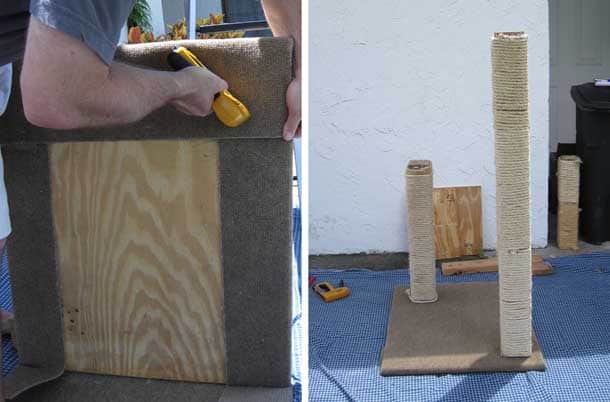
Next, lay the remaining platforms on their respective pieces of carpet. Fold the carpet around them and staple securely. You will need the 1/2″ staples for the places that the carpet overlaps in several thicknesses. Again, you can use a hammer to make sure that the staples are flush with the wood.

Position the corner of the middle platform on the shorter post and screw it on.
 If you drive the screws directly down into the carpet and tighten them flush, they will vanish into the texture of the carpet, and they won’t pose a hazard to the cats when they use the tree.
You want to make sure that nothing is sticking up or through the platforms that could poke up and injure a cat climbing on the tree, and also make sure that all screws and other hardware are flush with the wood so that they don’t pose any kind of an injury hazard. Having a tree hurt them is a sure way to prevent a cat from ever using it again.
(This is the point in the project where Florida’s daily 4pm rainstorm arrived several hours early, and the whole project had to relocate to the garage. I only took a couple photos in the garage because I may overshare a lot of things, but my messy garage is not one of them.)
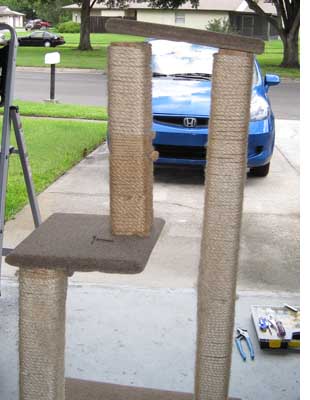 Attach the corner of the small, top platform to the tall pole.
Now you have the middle platform attached to the shorter pole and the top platform attached to the tall pole. This allows you to adjust the location of the final pole so that it spans the distance between the middle and top platforms.
Screwing them in is a little tricky. This would have been easier if the rain hadn’t driven us indoors, so I don’t have photos of the attachment process. Screw the top of the pole into the top platform, then lay down and screw up through the middle platform to screw the bottom of the pole securely to the middle platform.
If the cat tree was being made from scratch, the final step would be to wrap the poles in sisal rope. Since since this was a refurbishment, they were already wrapped, and the cat tree could go back into the house.
The result…
Newton: This doesn’t smell quite like my cat tree.
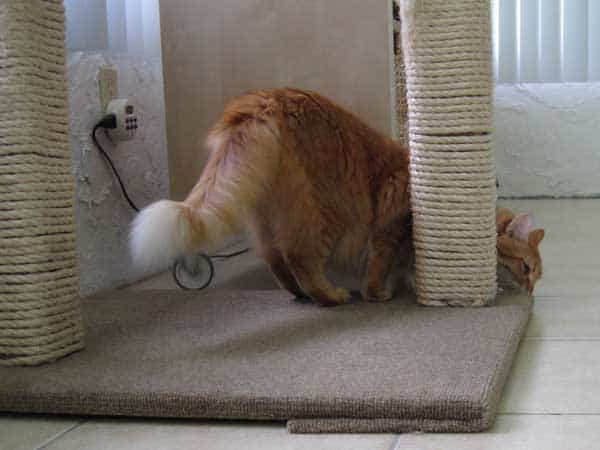
Newton: Hey, Pierre, what do you think?
Pierre: *sniff sniff* You’re right. This doesn’t smell the same.

Pierre: It’s acceptable. But it’s going to take some time for it to smell the right way. Don’t do that to my tree again soon, okay?

Special thanks to the manpeep for his help with recarpeting the cat tree and for doing all the stuff with power tools. The project went much faster with his help!


We especially liked seein the sisal rope wrapped around posts!
Wow, your humans did a really amazing job! Too bad my human isn’t very good at this sort of thing – our cat tree is over 10 years old and could really use this treatment.
Our Mum isn’t the handiest of people with a hammer and goodness knows how she would manage a saw!!
Luv Hannah and Lucy xx xx
Wow, that was such a great post on doing the refurbishing. You all did such a good job fixing that tree up. Those are some mighty lucky kitties to have a new tree. Enjoy your Thursday.
I was amazed when I saw this post and commented about it to Marc. I never knew, until now, that the cat tree Alex had Marc made… Sadly it was destroyed in Sandy… Learn something new every day…
That looks amazing! Your peeps are very talented.
Great work with the refurbishing! The cat tree Mommy bought for us from the pet shop isn’t holding up very well, especially the top part. It sways when we get up there so we avoid the tree. We will scratch the bottom poles and maybe the one on the *first floor* but we rarely ever go further than that. Maybe Mommy needs to make us one!
Wow, good job! We’re not sure the mom is as handy as your head peep and she’d probably just make a big mess. She has tried to re-sisal our scratching post and did an okay job.
Now you guys better get busy making that cat tree smell right!
excellent….mom wants to know if you rent out the manpeep (she’s got no skills). MOL
that is on her list of things to go – mainly get the carpet off the posts of our tree and put on rope. don’t hold your breath
Great DIY project for cat owners. Thanks for sharing.
Very nice! We are impressed!
That was perfect! Our people always wondered how to do that. Purrs…
Oh, my Dad would be totally lost!
We are bookmarking this article for our Pop to read( and hopefully build one)
That’s a great job of refurbishing the cat tree.
Pawsome! Your Manpeep did a fantastic job!! Our Dad builds cat trees. It started out where he was doing it to help with the Rescue work but one person asked him if he could build one and well things just took off. Now he does 4-5 shows a year and takes in many personal requests.
Looking good! Your Manpeep did a really great job! Hope you like your new carpet!
Whoa! Your peeps must really love you if they put in that much work.