One of the things we heard in comments for our previous Caturday Art posts was that everything sounded hard to create in Photoshop, and that the videos we pointed to on YouTube were hard to follow. So we decided to take you on the journey of creating our image for the Caturday Art blog hop today.
We use Photoshop Elements 10, which is a slightly older version, but its big brother Photoshop is similar enough that you ought to be able to follow along whichever you have. For this project, we chose a photo of Ashton sitting in the window that Aunt O took with her new camera.

Duplicate the layer that the image is on. You can do this by right-clicking the layer in the palette and selecting Duplicate Layer. A new layer, named Background copy is added to the palette.

Click the Background Copy 2 layer in the Layers palette to make sure it’s your working layer. Then select Filter > Stylize > Glowing Edges. You can use the preview to play around with the result so that you have nice, thick outlines around the outside of your image before running the filter on your image. The result looks like Ashton is hanging out under a black light.

Is Ashton going to a rave?
No, we’re going to use this outlined image like a sketch by reversing the colors. Select the whole image (Select > All or Ctrl+A) and then invert colors (Filter > Adjustments > Invert or Ctrl+I).
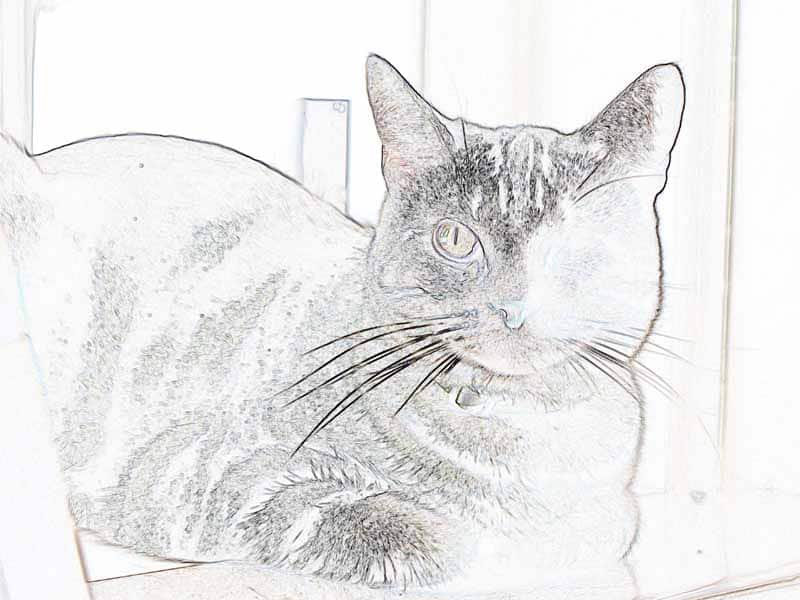
This is a kind of neat effect, like you drew it with colored pencils. But we aren’t done yet! Let’s take the color out of this so that it looks like a black and white sketch instead by selecting Enhance > Adjust Color> Remove Color (or Shift+Ctrl+U).
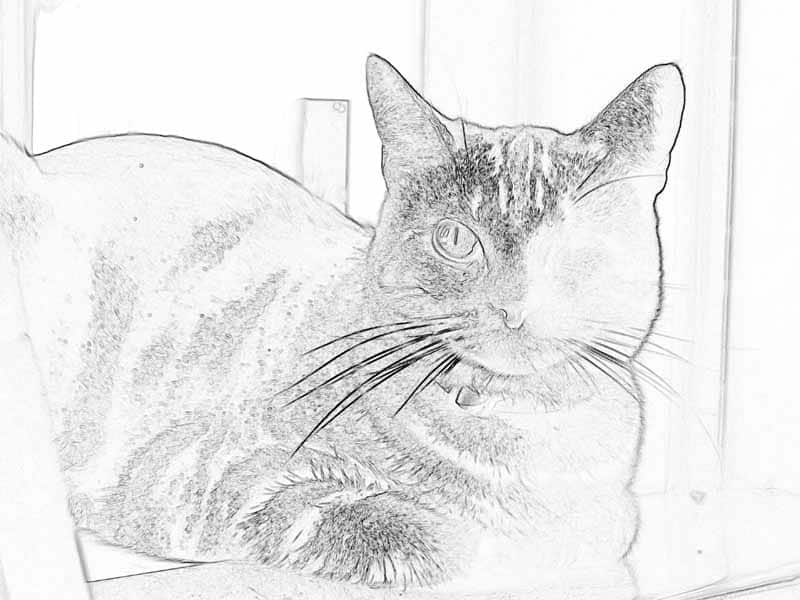
Now we have a black and white sketch of Ashton hanging out. Let’s color it in a bit.
In the Layers Palette, click the eye icon for the Background Copy layer to hide it. You will see the original image on the Background layer again. Right-click the Background layer on the Layers palette and select Duplicate Layer. This time, the new layer is named Background copy 2, since there is already a Background copy layer.

Click the Background copy 2 layer to make it the active layer, and choose Filter > Brush Strokes > Spatter. Use the slider controls for the filter and the preview window to get a nice, diffuse image. You probably want to turn the Spray Radius up and the Smoothness down for a nice effect.

Now you have a black and white outlined layer and a blurry layer of the same image. Let’s combine them. Click the eye icon next to the Background layer to hide it. Nothing actually changes on the screen when you do this, since it is currently hidden behind the blurry image.
Click the eye icon next to the Background copy layer to display it. The black and white image covers up the blurry colored image. Click Background copy in the Layers palette to activate it and select Multiply from the mode menu right above the layer on the palette. This makes the white parts of the layer transparent so that the outline overlays the blurry colored layer below.
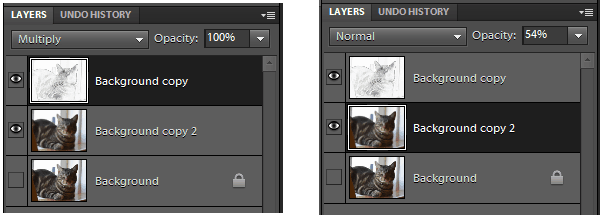
Click Background copy 2 in the Layers palette to activate it, and change the opacity to something like 50%. The already blurry image of Ashton becomes lighter, as if it was painted with watercolor.

How was that? Was that really hard? You can do it! The fun thing about using layers and effects is that you can combine them in lots of different ways to get fun effects.
If you want more tutorials, our friend Sparkle has done some great tutorials for previous Caturday Art weeks, with lots of different effects you can try.


Wow, we have PhotoElements 12 and TBT cant even to THAT!
Excellent tutorial, thank you for the giving us all the steps! We’ll let you know if we can pull it off…MOL! Lovely, sweet Ashton what a gorgeous photo of you and very cool effects. Happy Caturday!
Meez don’t fink wees hav dis app. but meez don’t know dat it wuld mattew. MOL Meez and mommy boff got lost aftew da fiwst click. MOL Wees just not dat smawt. You’s vewy talented and wees os happy tu view yous luvvly foto. Wees just choose da app wees du hav dat sez watewcolow. and den mommy clicks on da foto hers likes and da app dus it all fuw hers. MOL Wees eevew dumm or lazy. Yous deecide. MOL
Luv and Hugs and Kitty kisses ♥♥♥
Dezi
Very cool tutorial! I thought it was really easy to follow – and thanks so much for the shout out!
Thanks for the explanation. Mommy keeps forgetting how she does stuffs. We are going to bookmark this post for helps when we needs it.
You do look divine in any line Ashton!
Good job in doing all that. And great instructions. We should be able to figure that out. We like the finished result. Take care and have a great week end.
Those pictures are neat! 🙂
Luv, Angel Keisha
We have Photoshop Elements 11 but my mum is very slow at getting the hang of it!
Great pic!
Purrs xx
Athena
Nice job!!!
What a cool effect…and a really awesome tutorial!
: )
Mom bought two books on Photoshop and STILL…STILL can’t get it right. She will save this and try your steps! Ashton Mr Jinx loves that he saw so many images of you!
Clever effects. Thank you for showing us how
Great tutorial. Very easy to follow. I love Photoshop. Your Caturday art turned out great!
I’ve never used PhotoShop but this is a great tutorial…and you look amazing as always, Ashton!
Wow this is fancy! If your human was my human I’d give her a big sloppy kitty kisses for this! Hugs
Madi your bfff
The tutorial was very good and the art you created was great! Nishiko xxx
The mom really needs to learn Photoshop so she can do cool pics like this.
Our Mommy is SO hopeless…your Head Peep at least HAS Photoshop!
I actually liked the pencil sketch black and white image best. You got way too technical for TW. She doesn’t know from copying layers. Layers to her are hens. MOL!
Gosh, you inspired my Human to kinda-sorta try her first artsy version of me but too late for Caturday. We’ll post it Sunday but it’s not as cool as yours!
Great step by step.
I have Photoshop Elements. I think I can do most of what you showed. I’ll have to experiement.
Thanks!
–Purrs (and wags) from Life with Dogs and Cats.